Using Remote Access—Windows 7, 8 and 10
Remote access allows you to connect to the college network from home and access the college network as if you were at college.
When using Remote Access for the first time, or if your computer has recently upgraded to Windows 10, follow the instructions below.
Step 1
Open up Internet Explorer and logon to RM Unify and click on the remote access icon. Remember, RM Unify can be accessed via the college website.
Step 2
The first time you use remote access you’ll be prompted to install an add-on. Click on the ‘Allow’ to do so. You need to do this or it won’t work.
Step 3
When prompted enter your network username and password and click on SIGN IN. Remember to type ‘norton\’ before your username (as shown in the image to the left)For example norton\sl
Step 4a
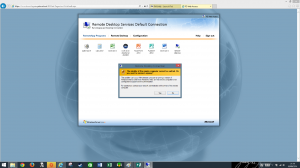
The first time you use remote access you’ll be prompted with a confusing message stating your browser is not supported. Assuming you’re running Internet Explorer 11, don’t worry, you’re not.
Step 4b
Click on the cog (settings) icon, then click on Compatibility View Settings. Next click on Add. This will add n-yorks.sch.uk into the list. Once done, click on Close. You’ll not need to perform this step again.
Step 5
The main Remote Access screen will now load. Depending on what applications have been made available, you may see more or fewer icons as is shown in this example. The important icon is the Remote Desktop icon. Click it.
Step 6
An information box will appear. Click on CONNECT.
Step 7
If prompted about the identity of the Remote Computer, click OK.
Step 8
You’ll then be presented with network screen with an icon with your username on it. Click on it and enter your password one last time. You’ll now have a desktop just as if you’re in college.


